Tutorial of StreamOne for Mac
StreamOne supports downloading videos from 1000+ popular streaming platforms and social media, allowing users to watch your favorite videos without the network. It is compatible with Mac running macOS 11 and above. Simply download the latest version for a try:
 DOWNLOAD Mac
1. How to Register StreamOne on Mac Computer
Step 1. Download and launch the program on your Mac computer.
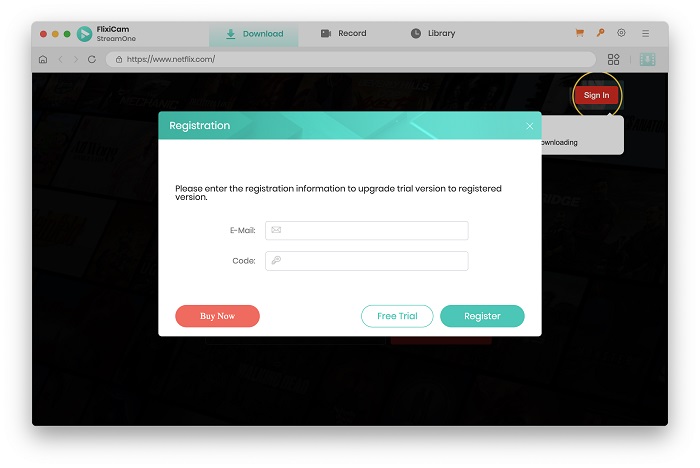
Step 2. You will see the ![]() icon in rhe top right area. To unlock all functions of StreamOne, you need to register the program first. Or you can click the "
icon in rhe top right area. To unlock all functions of StreamOne, you need to register the program first. Or you can click the " " icon (on the upper right), then select Register. You will be prompted to input your license key and email address in a registration dialog box.
Note: Because the registration information is case-sensitive, make sure that the registration information is exactly same as given. Ensure that no spaces are included before or after the registration email and code.
2. How to Use StreamOne to Download Videos on Mac?
 Read User Manual
Step 1. Run StreamOne on Mac and Select the Website
To begin, open StreamOne on your Mac. Then, you need to select the desired website by clicking on the icon located to the right of the search box.
- Free: YouTube, Abema, BiliBili, CBS, Dailymotion, Facebook, and TikTok.
- Paid: Netflix, Amazon, Disney+, Hulu, Max, Paramount+, Discovery+, U-Next, Apple TV+, Peacock, DMM, Hotstar, NHK+, Crunchyroll, and more.
Step 2. Select Format, Language, Video Codec
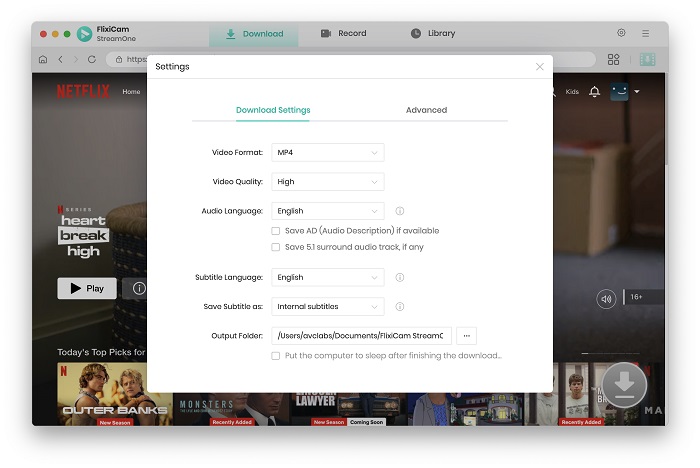
Press the  button to open the Settings window. You can select the default settings such as the output format, language preferences, choose the output directory, and switch between video codecs like H.264 and H.265. from the Advanced tab.
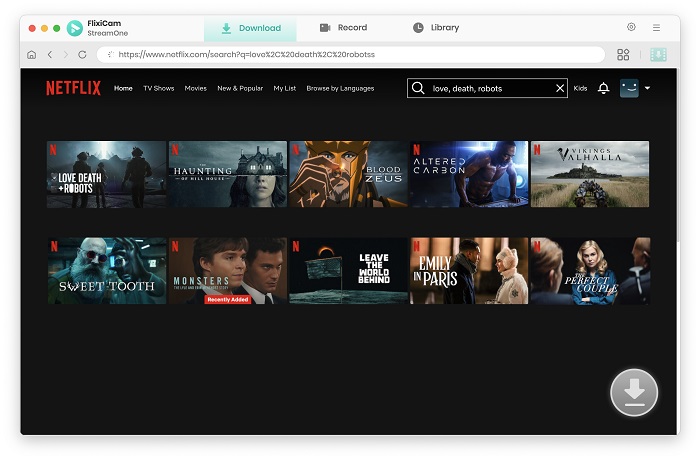
Step 3. Search for Videos on StreamOne
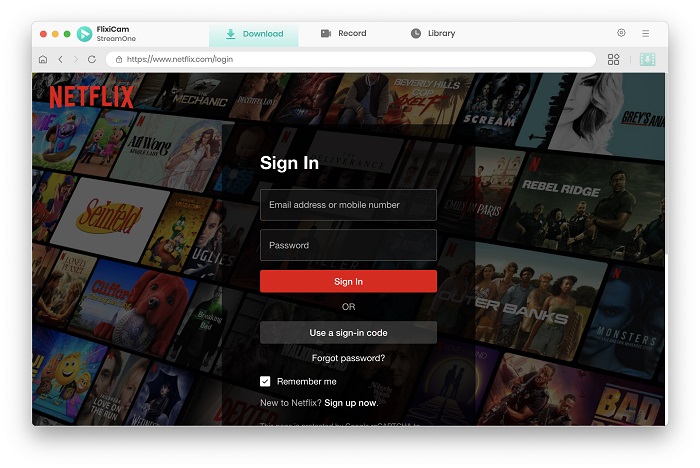
Frist, log into your account if you are prompted. As the program is equipped with a embedded browser, you can browse the library of the target website, or directly input the keywords or name of the video you want to download. The process is user-friendly even for newcomers.
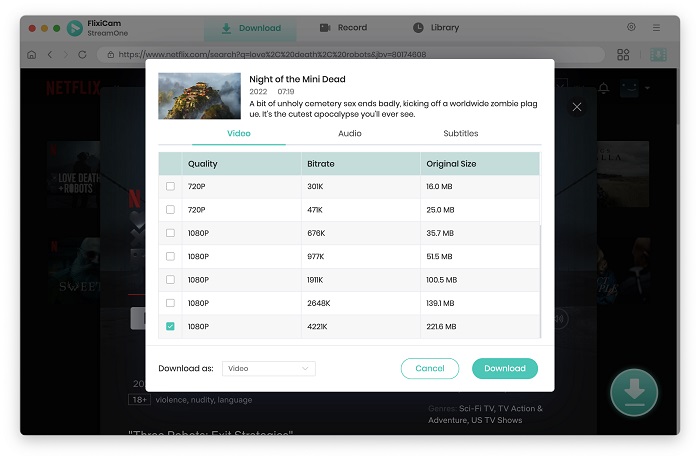
Step 4. Activate the Download icon and Choose Video Quality with Different Options
Click on the video's thumbnail to access its details or playback page. At the same time, the download button positioned in the lower right corner will become active. StreamOne allows you to select various file sizes, and multilingual audio and subtitle tracks. Moreover, it enables the downloading of entire seasons of series.
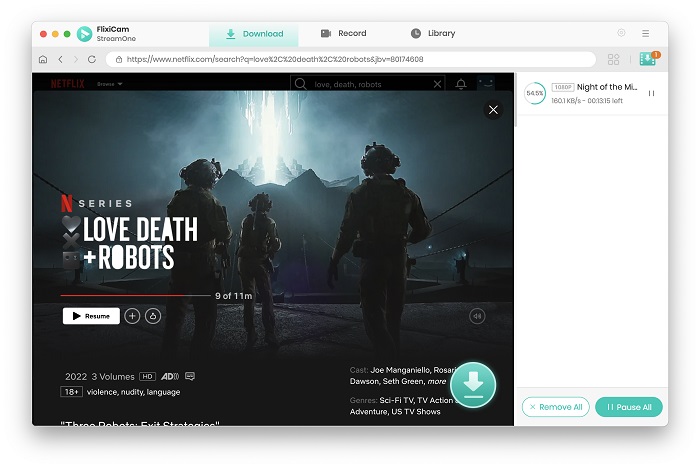
Step 5. Start to Download Videos on Mac
Tap the Download button to start the download process. The download progress and the video's detailed information will be shown in the right panel. When the process completes, you'll receive a notification.
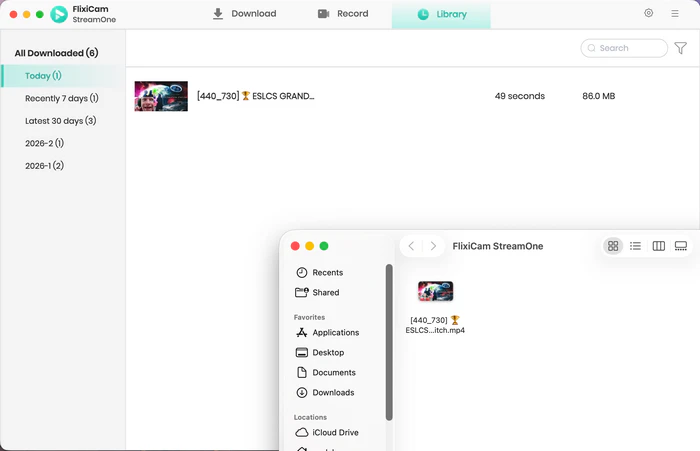
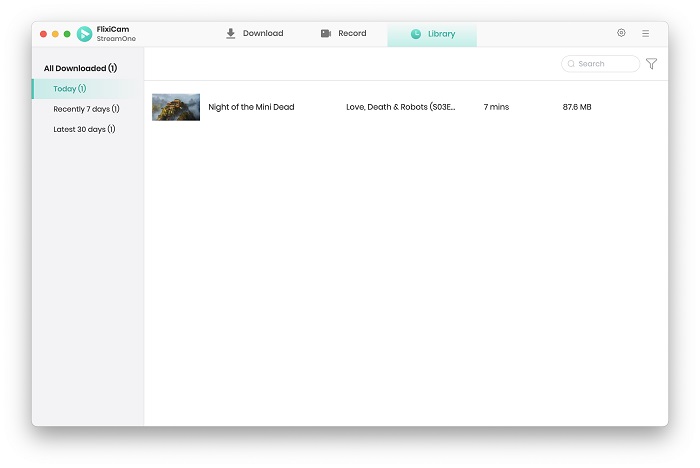
Check the Library tab to see the downloaded files. Just click the folder icon, you will be directed to the output folder.
3. How to Record Videos with StreamOne on Mac?
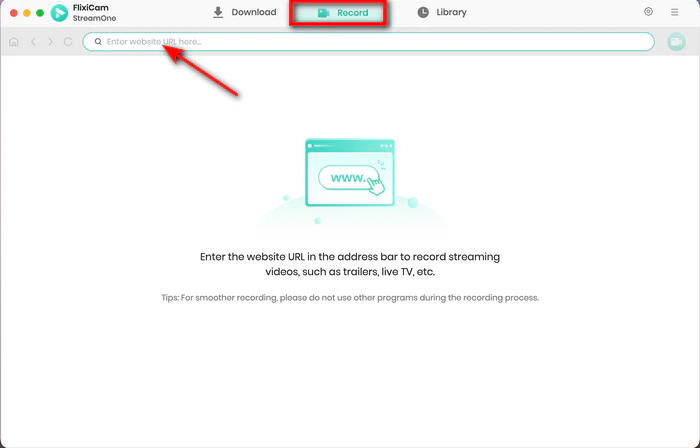
Step 1. Launch StreamOne and Enter URL of the website
Open StreamOne on your Mac, click the Record tab, and enter the URL of the website into the address bar.
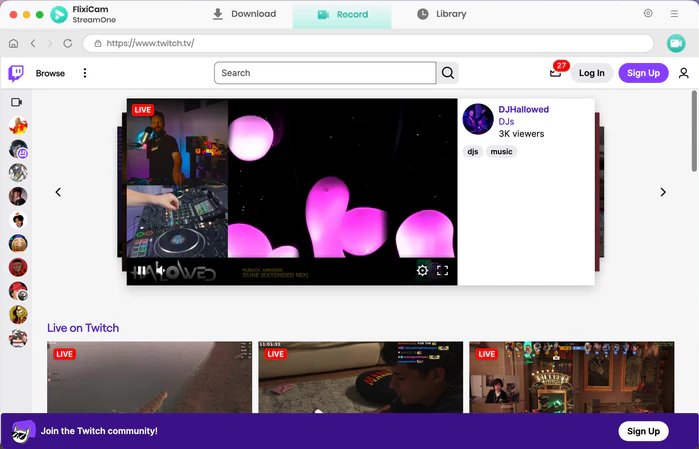
Step 2. Find the Target Video
StreamOne is equipped with a built-in browser, so you can stream the content you want to download directly in this program.
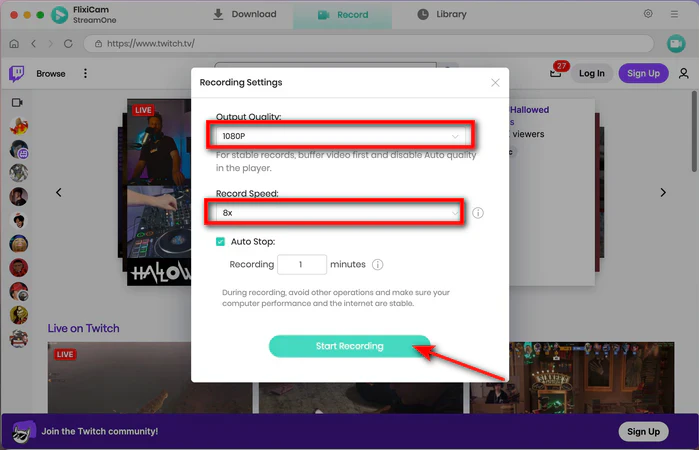
Step 3. Customize Record Settings
Click the record icon in the top right corner. A window will pop up letting you select your desired video quality, with options ranging from 480p to 1080p. FlixiCam can record up to 8x faster than normal. You can set a timer so the recording stops on its own when the time is up.
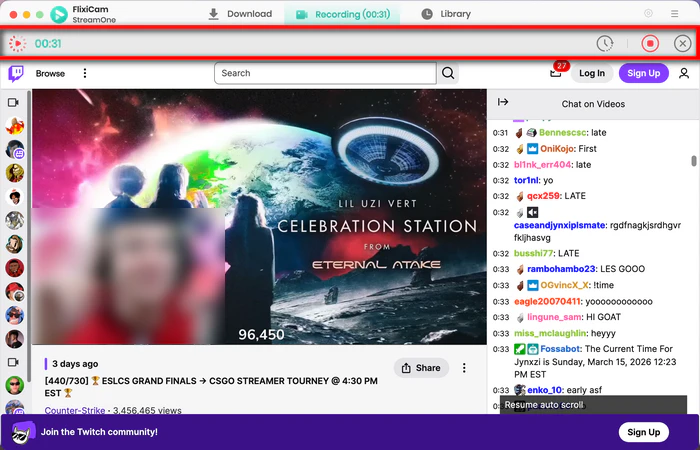
Step 4. Start Recording Video
A timer will appear on the screen, tracking the duration of your recording. To pause at any time, simply click the pause icon located in the upper corner. When you're ready to end the recording, click the stop button to save your video. If you want to skip a part you don't need, just drag the video forward.
Step 5. Locate recorded video
Once the recording process done, you can find the video files in the Library tab. To locate the actual files on your Mac, simply click the folder icon. It will directly open the output folder you set earlier.